

 Seenclassified
 Request Access
Needles for Brother Embroidery Machines: A Complete Guide
Introduction
A beautiful embroidery design can quickly turn into a frustrating mess when the wrong needle is used. Broken thread, skipped stitches, fabric damage, and uneven lettering are often blamed on the machine, but the needle may be the real problem.
Choosing the right needles for Brother embroidery machines is one of the simplest ways to improve your embroidery results. The needle creates every stitch, so its size, point, condition, and compatibility matter.
Whether you are embroidering a T-shirt, denim jacket, cap, towel, or delicate fabric, the right needle helps the thread move smoothly through the material. In this guide, we will explain needle sizes, common types, replacement signs, and practical tips for getting cleaner embroidery.
Why the Right Needle Matters
An embroidery needle does more than make a hole in fabric. It has to work with the thread, fabric, stabilizer, and embroidery design.
A poorly chosen or damaged needle can cause:
- Thread breaks
- Skipped stitches
- Puckering
- Uneven stitch formation
- Fabric holes
- Needle breaks
- Poor lettering
- Excessive thread shredding
Think of the needle as the link between your embroidery machine and the fabric. If that link is not working properly, even a well-digitized design may not stitch as expected.
What Needles Work With Brother Embroidery Machines?
Many Brother embroidery machines use standard household embroidery needles, but the exact recommendation can vary by machine model and project.
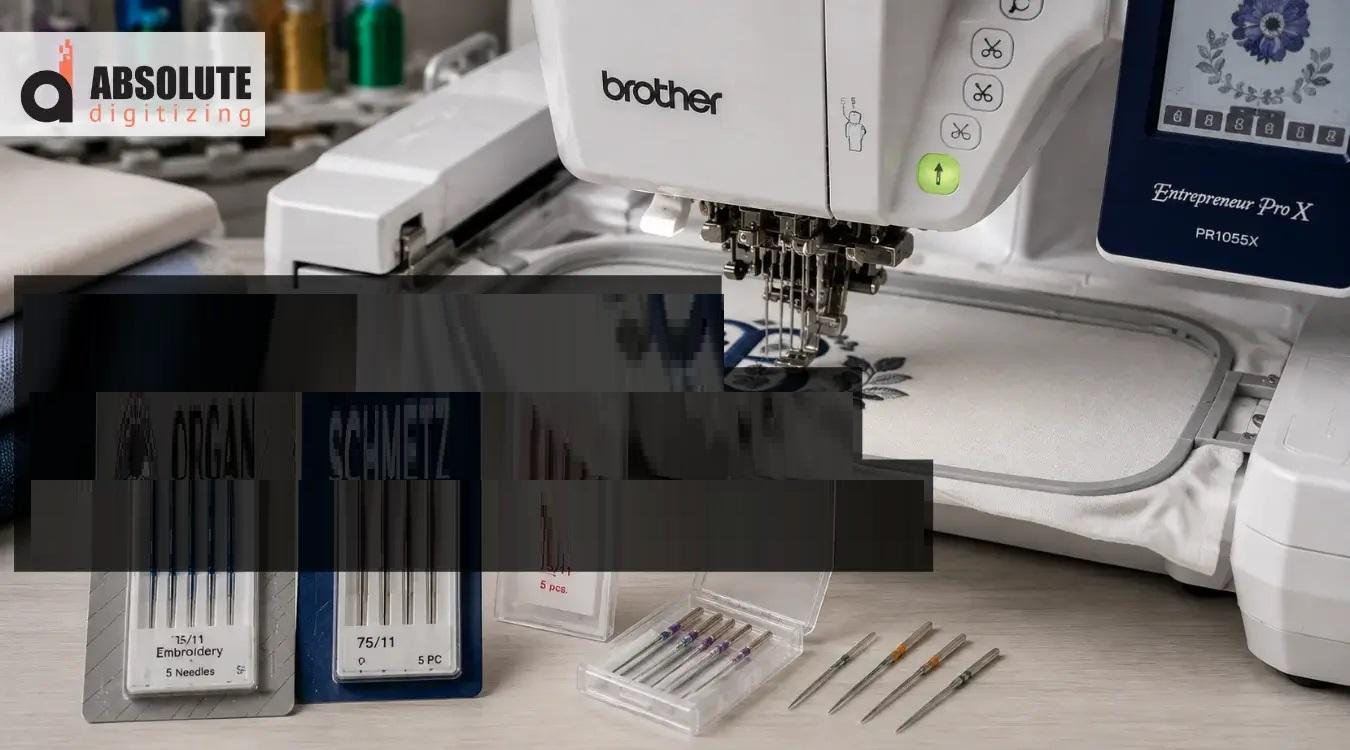
For most everyday machine embroidery, a 75/11 embroidery needle is a common starting point. A 90/14 may be more appropriate for heavier fabrics or certain thicker embroidery applications.
Always check your machine's manual before choosing a needle size.
The most important factors are:
- Needle size
- Needle type
- Fabric weight
- Thread thickness
- Design density
- Machine model
Understanding Embroidery Needle Sizes
Needle sizes can look confusing at first, but the basic idea is simple: the larger the number, the thicker the needle.
Common sizes include:
65/9
A 65/9 needle is relatively fine and can be suitable for lightweight fabrics and delicate embroidery applications.
Because it is thinner, it may not be the best choice for heavy fabrics or dense designs.
75/11
The 75/11 size is a popular general-purpose option for machine embroidery.
It can work well for many common projects, including embroidery on lightweight to medium-weight garments.
80/12
An 80/12 needle provides a little more strength than a 75/11 and can be useful for medium-weight materials and certain embroidery projects.
90/14
A 90/14 needle is thicker and may be suitable for heavier fabrics or projects that require a stronger needle.
However, using a larger needle on delicate fabric can leave unwanted holes, so size should always match the material.
What Is an Embroidery Needle?
Embroidery needles are designed specifically for machine embroidery. They are often made to work smoothly with embroidery threads and repeated high-speed needle movement.
Compared with a general sewing needle, an embroidery needle can have design features intended to reduce thread friction and support smoother embroidery.
When shopping for needles for Brother embroidery machines, look for needles specifically intended for machine embroidery rather than choosing only by size.
Choosing the Needle Based on Fabric
The fabric should always influence your needle choice.
Cotton
For ordinary cotton shirts and similar materials, a medium embroidery needle such as 75/11 is often a useful starting point.
Denim
Denim is heavier and may require a larger, stronger needle, depending on its weight and the design being stitched.
Fleece
Fleece can compress and move during stitching. The needle is only one part of the solution; proper stabilization is also important.
Towels
Towels have a textured surface that can hide embroidery. A suitable needle combined with proper stabilizer and design settings can help produce cleaner results.
Stretch Fabric
Stretchy fabrics need careful stabilization because the material can move during stitching. A suitable needle alone cannot solve every embroidery problem.
Choosing Needles for Different Thread Types
Thread and needle should work together.
Embroidery thread can vary in thickness, material, and construction. If the needle eye is too small for the thread, friction can increase and lead to shredding or breaks.
If you notice the thread repeatedly breaking, check both the needle and thread rather than immediately changing your embroidery design.
For metallic or specialty threads, a needle designed for that application may provide better results.
When Should You Replace an Embroidery Needle?
One of the easiest embroidery maintenance tasks is replacing the needle regularly.
A needle may become dull, bent, or damaged after repeated use. Even if it looks fine, the tip can become less effective.
Consider replacing the needle when you notice:
- Repeated thread breaks
- Skipped stitches
- Unusual needle noise
- Fabric damage
- Poor stitch formation
- A visibly bent needle
- The needle hitting the hoop or another object
For frequent embroidery, it is smart to keep spare needles nearby instead of waiting until the machine starts producing problems.
How Often Should You Change the Needle?
There is no single replacement schedule that works for every project.
Needle life depends on:
- Fabric type
- Design size
- Stitch count
- Machine speed
- Thread type
- Embroidery frequency
- Needle quality
A dense design on heavy fabric can put more stress on a needle than a small design on lightweight cotton.
If you are producing embroidery commercially, tracking needle use can help create a consistent maintenance routine.
How to Change the Needle Safely
Changing a machine needle is simple, but it should be done carefully.
Step 1: Stop the Machine
Turn off the machine before replacing the needle. This reduces the risk of accidental movement.
Step 2: Remove the Old Needle
Loosen the needle screw and carefully remove the needle.
Step 3: Check the New Needle
Inspect the replacement needle for bends or damage.
Step 4: Insert It Correctly
Insert the needle according to the instructions for your specific machine model. The needle must be positioned correctly and pushed fully into place.
Step 5: Tighten the Screw
Secure the needle firmly without forcing or damaging the screw.
If you are unsure about the correct installation, consult your machine's manual.
Common Needle Problems and Solutions
Sometimes the needle gives you clues about what is going wrong.
Problem: Thread Keeps Breaking
A damaged needle, incorrect needle size, poor threading, excessive tension, or unsuitable thread can all contribute.
Try: replacing the needle and checking your threading and tension.
Problem: Skipped Stitches
A dull, bent, or unsuitable needle can cause skipped stitches.
Try: installing a new needle appropriate for the fabric and embroidery application.
Problem: Fabric Has Large Holes
A needle that is too large for lightweight fabric may create noticeable holes.
Try: moving to a smaller needle size suitable for the fabric.
Problem: Thread Shreds
Thread shredding may occur because of needle-eye friction, incorrect tension, damaged thread, or a worn needle.
Try: replacing the needle and checking the thread path.
Needles and Embroidery Digitizing
Even the best needle cannot completely fix a poorly digitized design.
Embroidery digitizing affects stitch density, stitch direction, underlay, sequencing, and other factors that determine how a design behaves on fabric.
For example, a very dense design can place extra stress on the needle and thread. A properly planned design can often stitch more smoothly.
This is why good embroidery results come from the combination of:
Quality digitizing + suitable needle + correct thread + proper stabilization + appropriate machine settings.
Tips for Better Embroidery With Brother Machines
Follow these simple habits to reduce common problems:
- Use the needle size recommended for your fabric and project.
- Replace bent or damaged needles immediately.
- Match needle size to thread thickness.
- Use the correct stabilizer.
- Check threading before starting a large design.
- Avoid running a damaged needle at high speed.
- Test new combinations on scrap fabric.
- Keep several needle sizes available for different projects.
- Check the machine manual for model-specific recommendations.
- Do not ignore repeated thread breaks or skipped stitches.
What to Look for When Buying Embroidery Needles
When purchasing needles for Brother embroidery machines, do not focus only on price.
Look for needles that are:
- Suitable for machine embroidery
- Correctly sized for your fabric
- Compatible with your machine
- Appropriate for your thread
- Designed for your specific application
Buying a small assortment of useful sizes can be practical if you regularly work with different fabrics.
When Professional Embroidery Help Can Make a Difference
Needles are important, but they are only one part of the embroidery process.
If your logo repeatedly produces poor results even after changing needles, the issue may be the embroidery file itself. Incorrect density, poor stitch direction, or unsuitable design settings can affect the finished result.
Absolute Digitizing can help businesses and embroidery users prepare artwork with the stitch structure and application in mind. A properly digitized design gives your machine a better starting point for producing clean embroidery.
Final Thoughts
Choosing the right needles for Brother embroidery machines does not have to be complicated. Start by considering your machine model, fabric, thread, and design.
For many everyday embroidery projects, a 75/11 embroidery needle is a useful starting point, while heavier materials may call for a larger needle. However, always follow the recommendations for your specific machine and application.
Most importantly, do not ignore your needle. A small, inexpensive replacement can sometimes solve problems that appear to be much more complicated.
With the right needle, proper stabilization, suitable thread, and a well-digitized design, you can achieve cleaner stitches and more reliable embroidery.
FAQs
1. What size needle is commonly used for Brother embroidery machines?
A 75/11 embroidery needle is a common starting point for many everyday machine embroidery projects. The ideal size depends on the fabric, thread, design, and machine model.
2. Can I use regular sewing needles for machine embroidery?
It is better to use needles designed for machine embroidery when possible. They are intended to work with embroidery thread and the repeated movement involved in embroidery.
3. How do I know when my embroidery needle needs replacing?
Replace the needle if you notice skipped stitches, repeated thread breaks, fabric damage, unusual noise, or if the needle appears bent or damaged.
4. What needle should I use for thick fabric?
Heavier fabrics may require a larger needle, such as 90/14, depending on the material and embroidery design. Always check the machine's instructions before selecting the size.
5. Can the wrong needle damage my embroidery project?
Yes. An unsuitable needle can contribute to fabric holes, thread breaks, skipped stitches, and poor stitch formation. Choosing a needle that matches the fabric and thread helps reduce these problems.

Invest in Luxury
Access curated opportunities across luxury assets, private markets, and alternative investments designed for long-term value creation and portfolio diversification.
Explore Opportunities
Private Cannabis Investing
The global cannabis market is expected to grow rapidly in the coming years. With this growth, investing with TheSeattleCannabis can be a smart move for those looking to diversify their portfolio. .
View Opportunities Dutch
Dutch
 English
 Arabic
 French
 Spanish
 Portuguese
 Deutsch
 Turkish
 Italiano
 Russian
 Romaian
 Portuguese (Brazil)
 Greek
Greek